- Welcome to the Givealittle Help Centre
- Charity Hub
- Social media badges for donors
Social media badges for donors
Donor badges are digital images designed for display in donor's social media feeds. They are a way for donors to demonstrate their support and generosity on social media, and to further raise the profile of a page.
Think of it as the digital equivalent to the coloured ribbon that you pin to your shirt.
The badge needs to be set up by the page owner and then, after donating, donors can choose to post the badge on their Twitter or Facebook timelines.
(The badge doesn't appear on the page itself; it's available to be shared from the donation success screen and from the receipt email.)
![]()
Adding a donor badge to your page
Badges can be added either at the time you’re creating your new page, or added to existing pages.
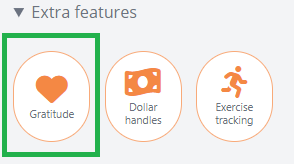
- Head to your Givealittle page, and make sure you're logged in. In the Page Tools Panel, click Gratitude.
- Would you like to offer donors a badge?. Select Yes.

- A preview of your new badge is displayed. To start with, this will be a template that can be customized. Select Edit.
- The top field allows you to set the image that is displayed. Ideally this should be a logo or line-art type image on a white background. Photos do not work well. The dimensions can be restrictive – if you can’t make your image fit nicely in the box then you might need to edit it in a paint program and add extra white-space to the sides.

- Use the zoom slider and drag the image around within the box to make it look how you want and select Apply Image. The preview at the bottom will update immediately to show how the badge would look.
- The next two fields are where you can customize the text that is displayed on the badge. When the badge appears on Facebook, selecting it will take the user through to your page so your Call to Action should include instructions that encourage selecting.
- Finally, choose a colour from the seven options and select OK to close the pop-ups.
- If you’re editing an existing page then select Confirm Changes. If you’re creating a new page then select Publish.
How donors redeem a badge
Badges can only be redeemed on pages that have been Moderated.
If a page offers a badge, donors who successfully donate will be given the opportunity to redeem their badge on the success screen. The easiest way to claim a badge is to select the Facebook or Twitter button next to the preview:
![]()
Changing & removing donor badges
Badges can be changed or removed by logging on to My Givealittle and
- Choosing Pages -> My Pages click on the title (in blue).
- Select Gratitude from the Page Tools Panel
- Select Edit, or remove it by answering the Would you like to offer… question with No.
- Select OK to close the pop-ups and select Confirm Changes to lock it in.
Note that changing or removing a badge from your page only affects future donors and does not affect historical donations. Those badges will still appear in the existing donor’s timelines.
Tips
- When choosing the text to display on the badge, use language that is written from the donor’s point of view. This badge will be published to their timeline and viewed by their friends.
- To create a feeling of exclusivity and avoid donor fatigue, consider only offering badges for a limited time. This could coincide with a fundraising drive or awareness week.