- Welcome to the Givealittle Help Centre
- Knowledge Base
- How do I get Verified?
How do I get Verified?
Every Givealittle user who receives funds from Givealittle must complete Verification; this process verifies your identity. This article explains at a high-level how the Verification screen works and concepts that apply across all sections. For help with a specific section, click one of the items below. For information on who we need to verify, and why, check out this article.
About our electronic verification
Our online process is a quick and easy way to have your identity verified electronically.
We can verify your Identity using the information on your New Zealand Drivers License or New Zealand Passport with the related Government Databases. Your address can also be verified through independent sources.
You will need a valid NZ Drivers License (current) or a NZ Passport (current or within 2 years of expiry date) to use this Verification process.
We will also require you to take some photos of your face and your photo ID, to prove that it belongs to you.
Note: We use Cloudcheck to process Electronic Verification applications. Your data will be treated confidentially and no information is stored on the Cloudcheck website.
Information required for verification
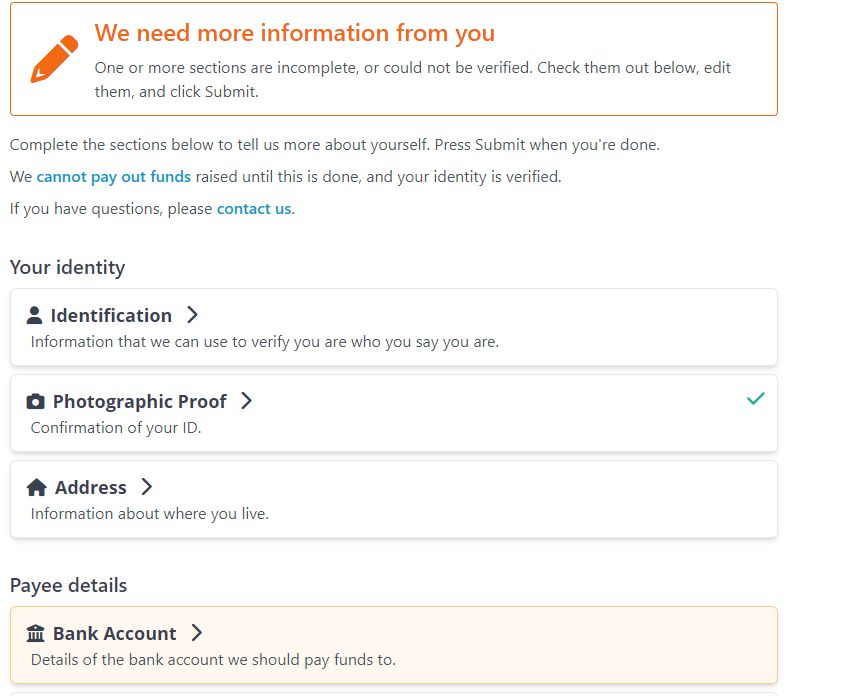
The verification process is managed using the Verification screen. There is a single screen used to gather information for verification, and different sections will show, depending on what we need to verify. To complete a section, click it, and a pop-up window will appear.
The possible sections are:
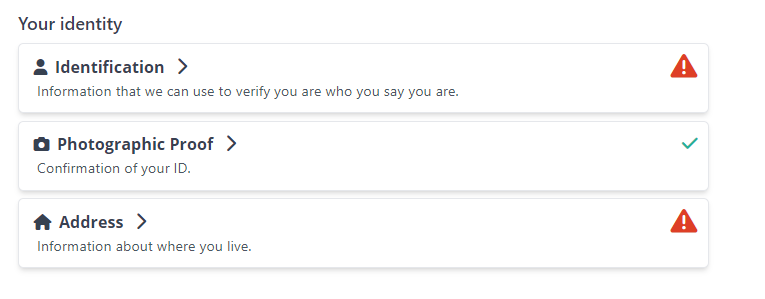
Your Identity
Payee Details
Optional Extras
Accessing the Verification screen
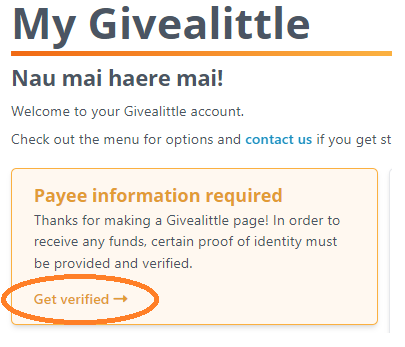
The Verification screen is accessed from the menu on your 'My Givealittle' account dashboard, which means you need to be both registered and logged in. The quickest way is by clicking Get Verified. You can also go to Account > Verification in the My Givealittle menu.
To register with Givealittle, follow the instructions here. NB: if you have received an email from us, requesting that you get verified, it is important that you register using the address that you received the email on.
Once you’re logged in, expand “Account” on the left-hand menu and choose “Verification”.
Filling it out
You will know when a section is complete because it will have a green tick next to it. Similarly, sections with an error will have a red exclamation mark.
When all sections are complete, click the green “Submit” button at the bottom of the screen.
If you want to save your work but are not yet ready to submit it for verification, click “Save for Later”. You can come back to the Verification screen at any point in the future and pick up where you left off.
Once the details have been submitted to us for verification, they are locked and the fields appear grey and read-only.
To make changes to a locked section click the “Unlock Fields” button. This will have the effect of unverifying your data and it will need to be re-submitted for verification again.
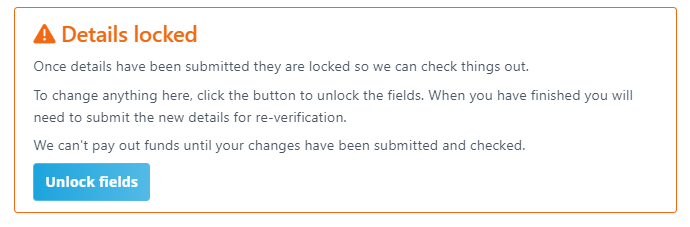
Funds will not be paid out until re-verification is complete.